This AgileShape unleashes the full power of Excel Services as a calculation engine. It is the combination of the other two methods and permits both writing (temporarily or permanently) and reading from an Excel document in the same step. In this case, the Save To field is not a required parameter, but instead it is optional.
NOTE: Write is carried out first and then Read in executed.
NOTE: This AgileShape is a specialized sub-type of the AgilePart AgileShape. Refer to the documentation for the AgilePart AgileShape for additional information about the properties and behavior that this sub-type inherits from the AgilePart AgileShape.
Design-Time Properties
NOTE: Since this AgileShape is a specialized sub-type of the AgilePart AgileShape, all of the standard properties supported by the AgilePart AgileShape are also supported by this AgileShape. Since they are already documented elsewhere, the standard AgilePart properties are not documented in this section. Refer to the documentation for the AgilePart AgileShape for information about the standard AgilePart properties. Additional design-time properties (other than the standard AgilePart properties) that are specific to this AgileShape are documented below.
Configuration
Excel Services URL (Required)
The URL of the Excel Service.
For example http://moss.litwareinc.com/_vti_bin/ExcelService.asmx This could include custom attributes like ${SharePointURL}${ExcelService}. Also schema XPaths can be added using the ellipsis button.
Runtime Template (Required)
The Excel template that will be used at run-time (either .xlsx or .xltx). This document will be copied to the location as defined by the Save To parameter. This could be custom attributes like ${SharePointURL}${RuntimeTemplateLibrary}${ExcelFilename}. Also schema XPaths can be added using the ellipsis button.
NOTE: This file should be equivalent to the Design-time Template file with the same named fields.
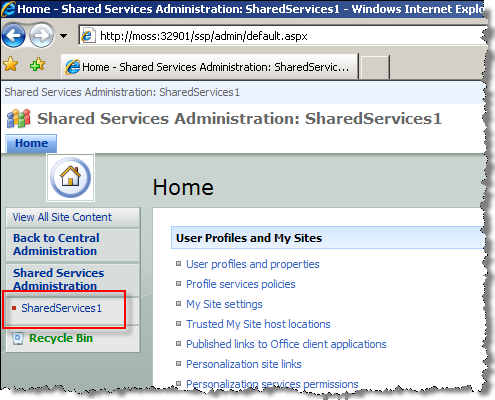
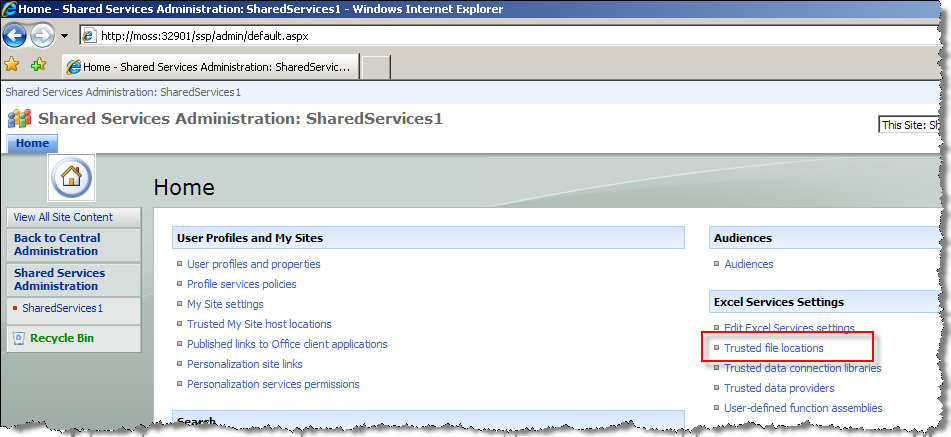
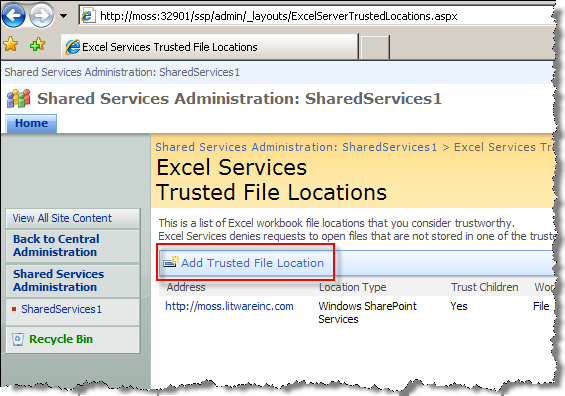
NOTE: This document should be located in either a SharePoint Doc Library or in a shared folder. Either way, this must be added to the Trusted file locations of the Excel Services (configured in SharePoint Central Administration - Shared Services):

Design Time Template (Required)
Excel template to use at design-time. This template document is loaded at design-time to get access to all the named fields in the Excel sheet for mapping purposes. It is not used at run-time.
NOTE: This file should be equivalent to the Run-time Template file with the same named fields. Also, while designing in Envision, the file should be accessible to the Process Designer from his/her PC via the Browse button.
Save To (Required)
The path and filename for saving the resulting Excel document. This can be in a SharePoint Doc library or in a directory path. This could also be an expression like ${SharePointURL}${ExcelDocLibrary}${ExcelFilename}. Also schema XPaths can be added using the ellipsis button.
Overwrite if Exists
Overwrite the Save To file if it already exists.
Mappings
In order to update the named fields in the Excel sheet, they need to be mapped to the process values here. The named fields appear in the list box on the right and can be mapped to, by selecting them first and then pressing the arrow button. Once a named field is in the mapping grid on the left, in order to map it to a process value, first select the row and then press the ellipsis button to select from the schema dialog for the process or type a custom attribute directly in the ProcessValue column. If the file in Design-time Template changes, then it is necessary to press the Refresh button to reload the named fields again.
NOTE: The value of the named field in the ExcelField column can be evaluated from a string containing a custom attribute, for example ${MyExcelField} or field${year}${month} or a schema XPath. For the latter, the XPath itself is parameterizable! (see notes below)
NOTE: The name of the custom attribute in the ProcessValue column can be drived from a string containing another custom attribute, for example ${MyCustomAttribute} or customattribute${year}${month} or a schema XPath. For the latter, the XPath itself is parameterizable! (see notes below)
NOTE: You can also use advance XPath expressions such as filtering. For example (XPATH)/my:myFields/my:field2[.>32] returns all items that match the filter (field2 > 32). In addition, you can combine XPath expressions and custom attributes like this: (XPATH)/my:myFields/my:field2[.>${myCustomAttribute}]
NOTE: If you have an XPath expression that returns more than one value, there is a feature for mapping them with a named field that is defined as a one-dimensional range in the Excel document. The AgilePart will fill the range with returned values from the XPath expression, but if the range does not contain enough cells for the number of values, it will not fill past the range of cells (in order to protect rest of the worksheet) and the remaining values will be simply discarded.
The following is a use case:
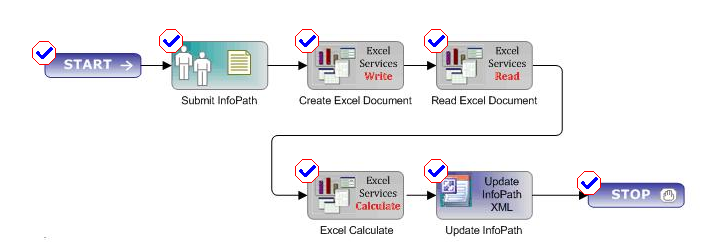
Here is a simple InfoPath-based Process that uses the three methods of the AgilePart:

The example process is to demonstrate the different uses of the AgilePart. It is not necessary to use all the methods in the same process. Steps to set this up are as follows:
Create InfoPath file
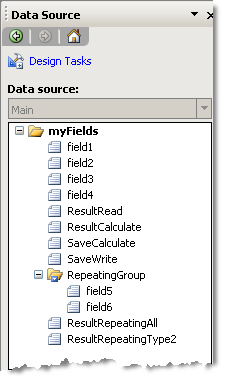
Create the form:
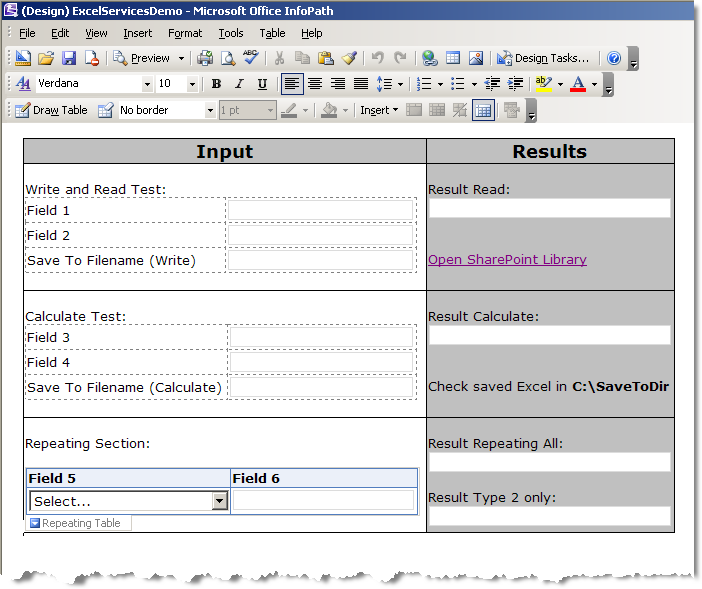
Save form as ExcelServicesDemo.xsn
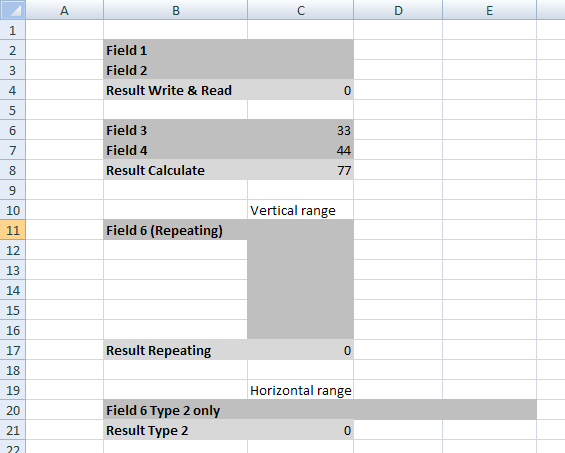
Prepare Excel Template, create an Excel document with the right structure:
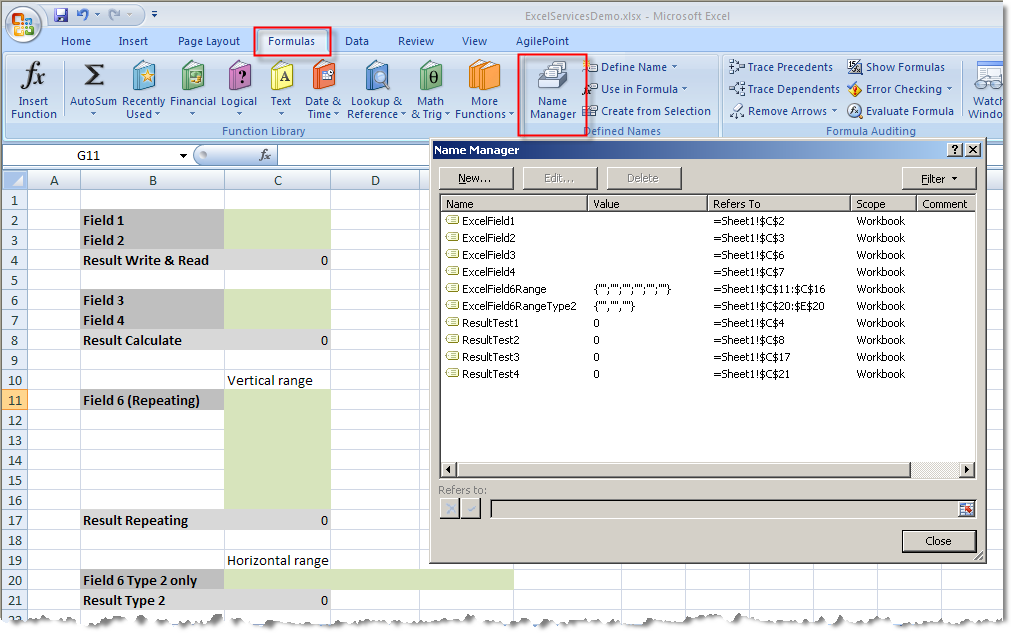
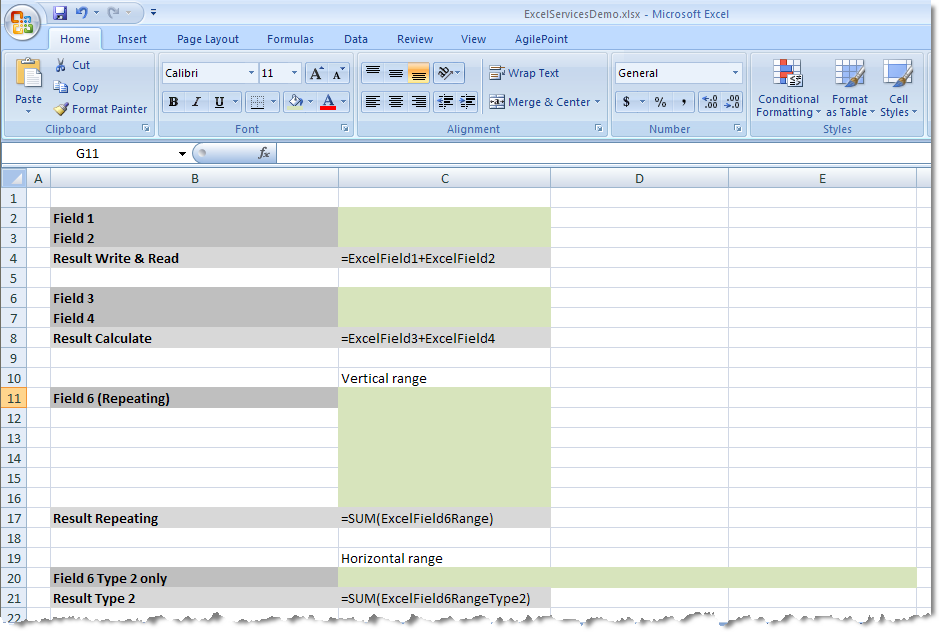
Save the Excel document as ExcelServicesDemo.xlsx on the Desktop.
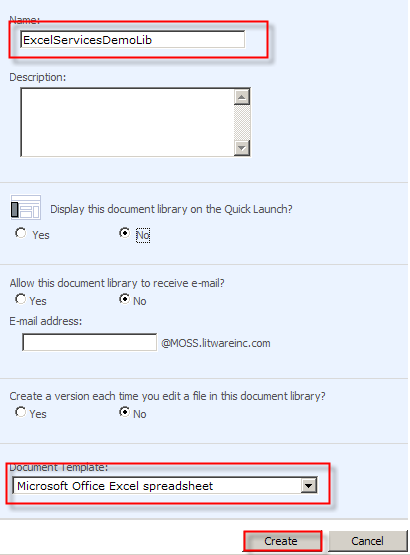
Create two SharePoint Doc Libraries to store the run-time Excel template and the resultant Excel file:
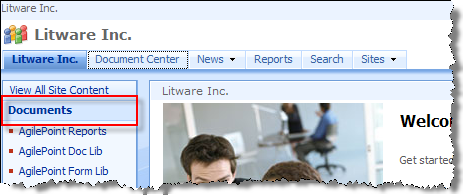
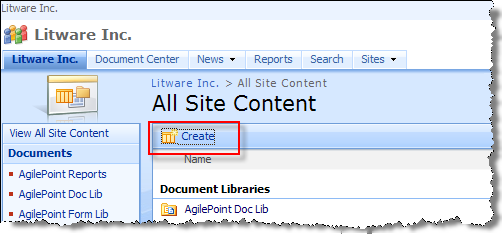
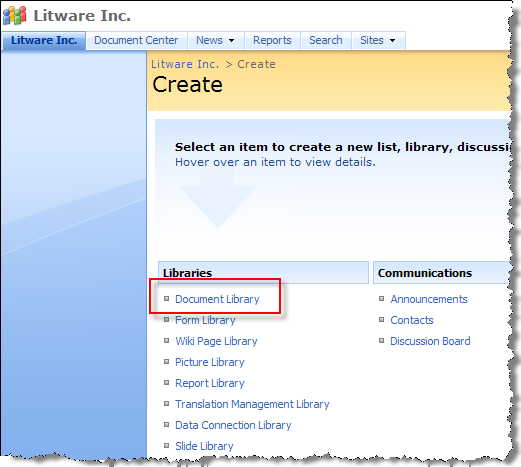
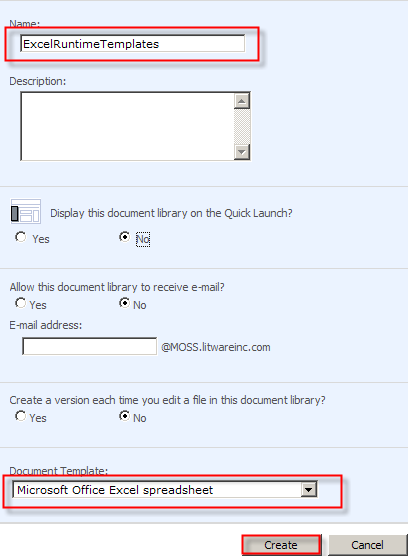
Call first one ExcelRuntimeTemplates:
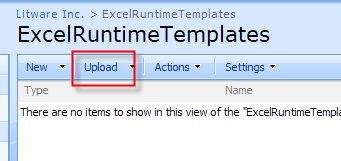
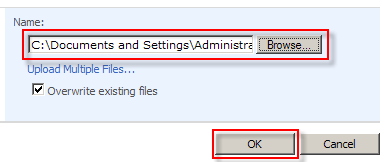
Browse to the Excel file ExcelServicesDemo.xlsx on the Desktop and upload it to the document library. (Another method is to Publish the Excel from within Excel itself.)
Create second Doc library to store resultant Excel file:
Design the Process. Design a new InfoPath process based on ExcelServicesDemo.xsn form.
Register the Excel Services AgilePart in Envision. File->Extend AgilePoint->Register AgilePart.
Copy the Excel Services.vss file to My Documents\My Shapes directory.
Open the Excel Services stencil in Envision.
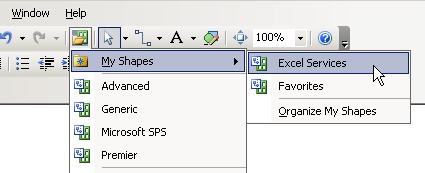
Drag an Excel Write shape on to the canvas.
Configure the shape as shown below:
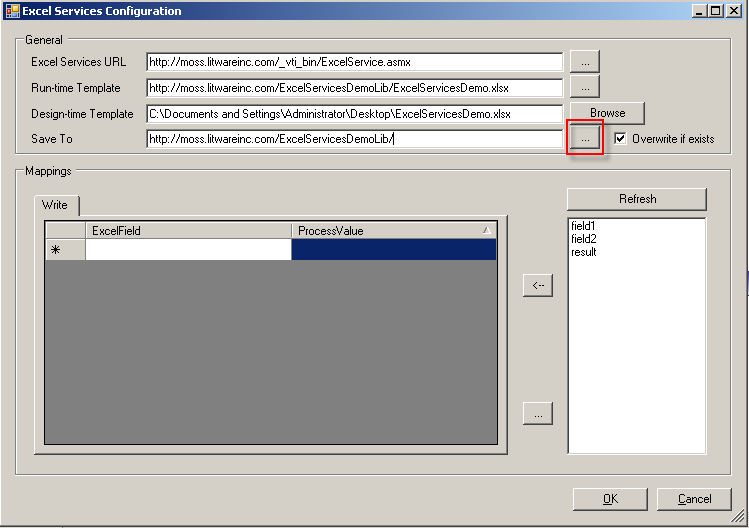
In the example, the SharePoint URL is http://moss.litwareinc.com. You should substitute it with your own site URL.
Use the Browse button to select the Design-time Template Excel document from the Desktop. The named fields list box gets filled automatically.
Type the URL of a SharePoint Doc Library in the Save To field. In this example it is http://moss.litwareinc.com/ExcelServicesDemoLib If the document library does not exist, it will NOT be created.
Click the ellipsis button (shown in red above) and select the form field SaveWrite.
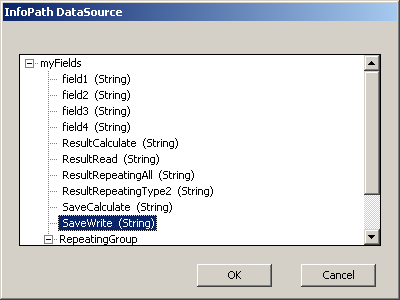
Add the extension “.xlsx”:

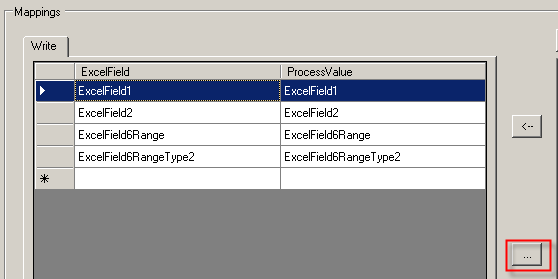
Configure the mappings: Select named field ExcelField1 from the list and press the arrow button shown in red:

Do the same for the other named fields. Now select the first row of the mapping grid and press ellipsis button as shown in red below:
Select field1 from the schema dialog:
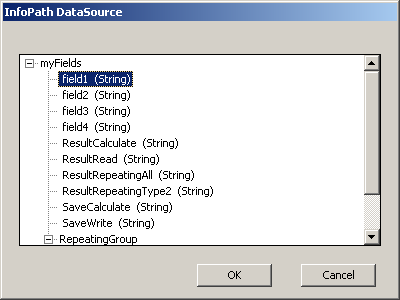
Repeat last two steps for all the other fields.
Manually change the XPath value for the Repeating Field Type 2 to: (XPATH)/my:myFields/my:RepeatingGroup[my:field5='Type 2']/my:field6
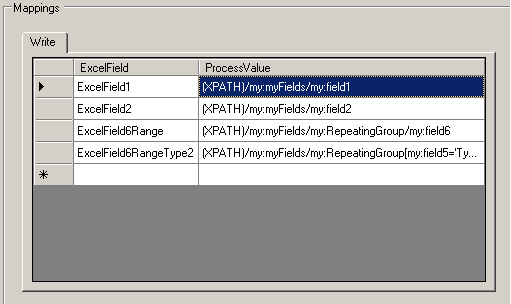
Press OK to finish configuring this Shape. Now to add a step in the process to read from an Excel document.
Drag an Excel Read shape on to the canvas:
Open the Configuration dialog and fill as shown:
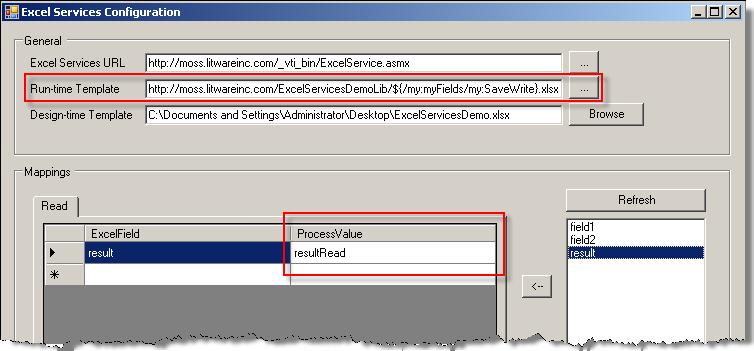
NOTE: This time, it is the Excel Document field that is using paramaterized value coming from the form.
Now to add another step in the process to write and read from an Excel document:
Drag an Excel Calculate shape on to the canvas.
In the Configuration dialog, set fields as shown:
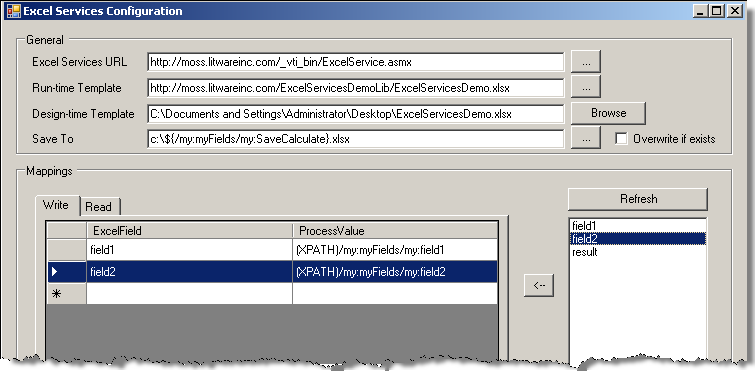
For the Read tab configure as shown:
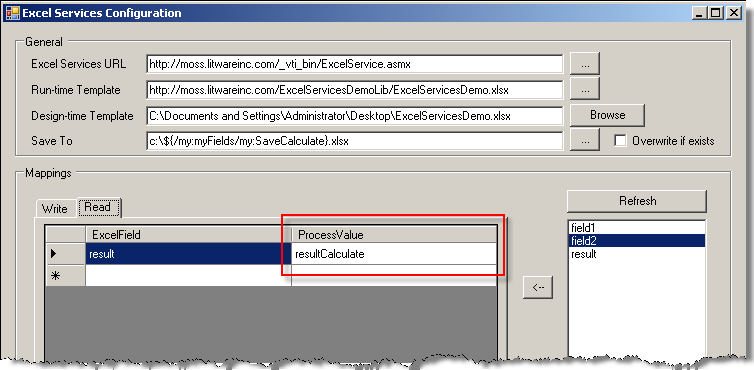
For the last step, add Update InfoPath shape and configure as shown:

Publish Process and InfoPath to ExcelServicesDemo:
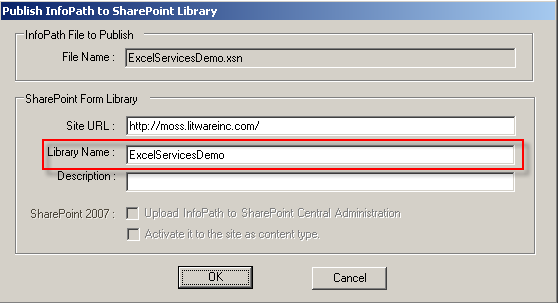
Initiate a Process.
Click New in the form Library ExcelServicesDemo.
Fill as shown and click Submit and Close:
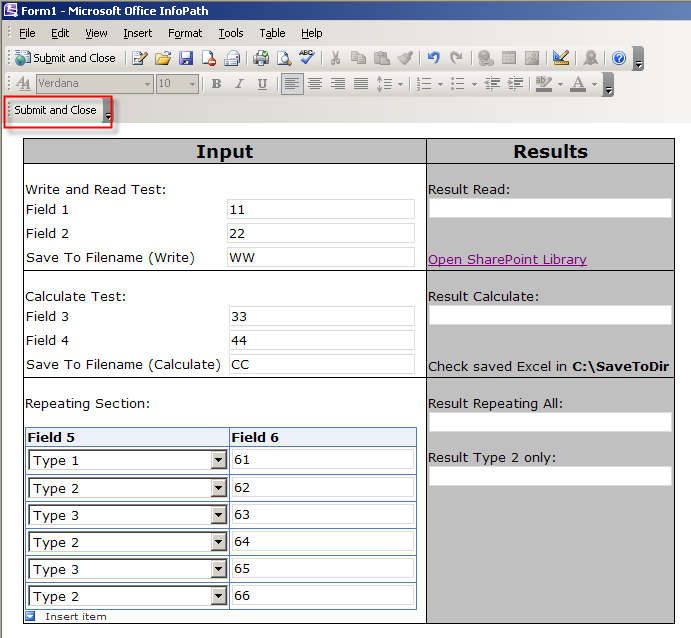
The process runs automatically.
Revising the results of running the process. Open the form just submitted and should see this:

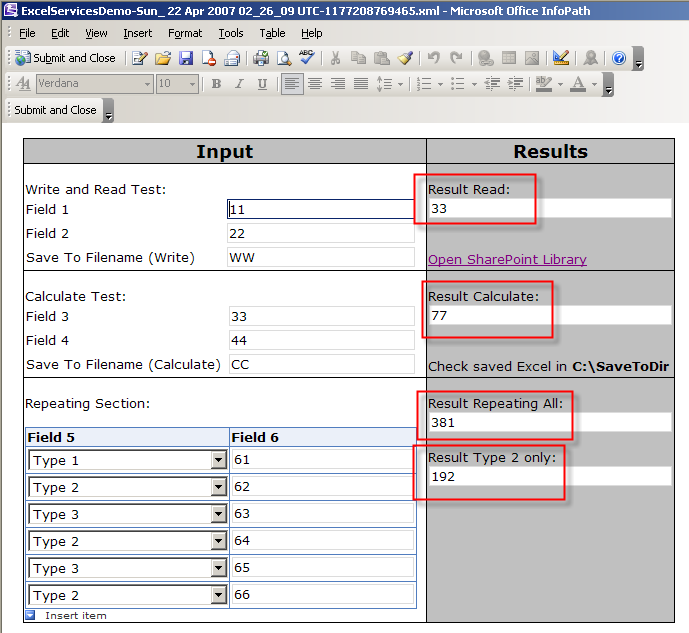
Click on the Open SharePoint Library link to open ExcelServicesDemoLib.
Open the Excel document created by first AgilePart to check it is correctly filled:
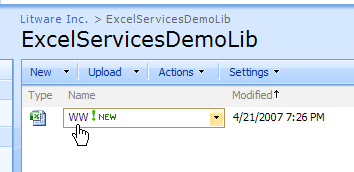
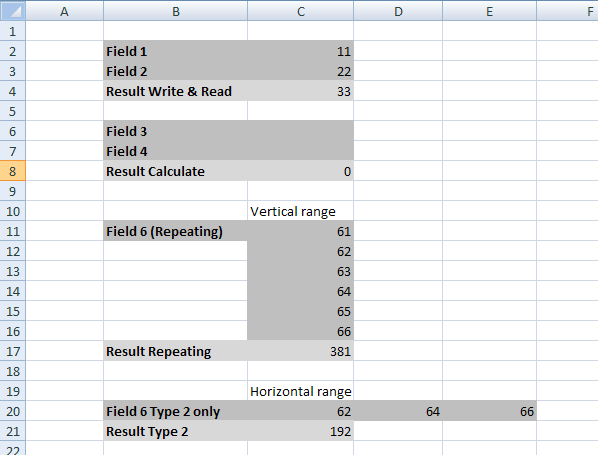
Check that the third AgilePart in the process has created an Excel file in C:\SaveToDir\CC.xlsx
